Often times we are faced with the ordeal of sending many files to a recipient. This can and will get very messy in a mail program, so I find the best way to do this is to create a zip archive to send them as one big file.
There is a common belief that ‘zipping’ a file will shrink it in size, but from my experience, this is rarely the case, and the size that it does shrink is very negligible.
To zip an archive depends on the program you have installed, but some common steps should apply.
- Select/highlight the files you would like to zip
- Right click on any file that’s highlighted and select ‘Add to Archive’. Note: this maybe on the list you see right there, or it may be nestled inside of a app like 7Zip, WinZip, or winrar (some popular apps), so you would then: right click on highlighted file -> hover over zip app -> on the new menu that pops up select ‘Add to Archive’.
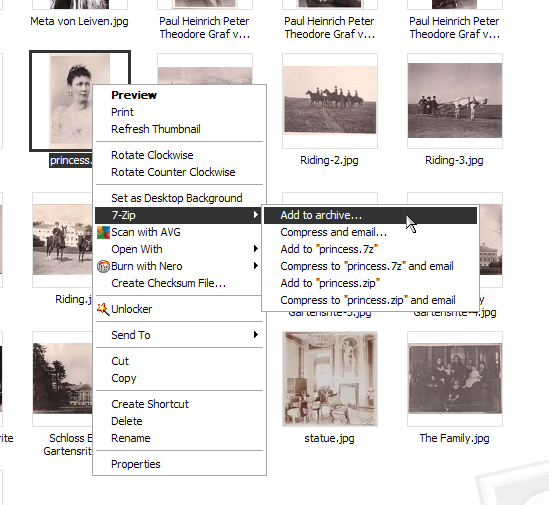
- When the new window pops up, the archiving program, you will want to select the type of archive to be a ‘zip’ archive, not a tar, rar, or another form. Note: You can select those other formats if you are certain the the receiving party will have the relevant de-archiving software, otherwise they will have to install a new program to be able to de-archive it.
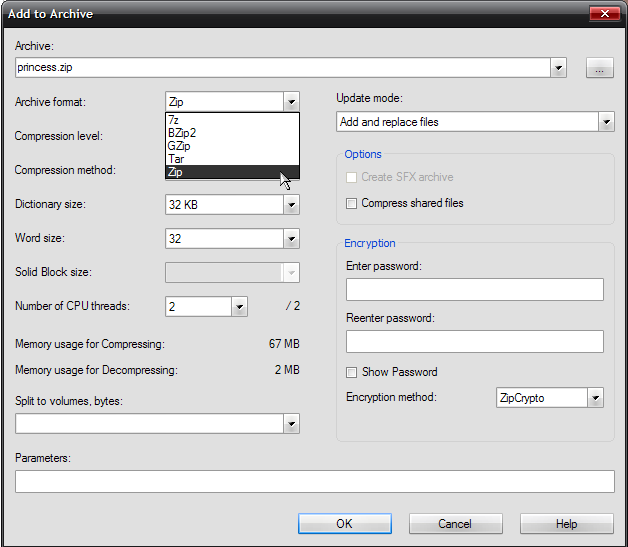
Presto, now you’re done and you should have a file in the folder you grabbed your documents from labelled as a *.zip file.

See our next post on how to extract the zip archive now.
Pingback: Extracting a Zip Archive | Electronic Services