Smartphone: Samsung Galaxy S3
XDA Developer link
All-In-One XDA Guide
Samsung USB Driver
First and Foremost
Backup your device if you can. Instructions and necessary warnings are at the top of this tutorial. I would also suggest taking a note (yes, writing down or typing out) of the status of your phone at this exact moment:
Settings -> About Phone
Model:
Carrier:
Android ver:
Baseband ver:
Kernel:
Build num:
S/N:
SIM:
IMEI:
Having this information will save you at least once if you’re really getting into your phone.
Protip: repeatedly tap Build Number to enable Developer Options on your Android smartphone.
Why ROOT and Install a Recovery
Smartphones are given to you with a carrier’s (Fido, Telus, Rogers, AT&T, etc.) ROM (stock), which means your smartphone is loaded to the walls with bloatware (software that they’re probably getting paid to include). This means you’re phone is bloated, it has lots of unnecessary software and apps that make your phone slow.
ROOTing your smartphone isn’t technically necessary to install a custom ROM, but it makes everything run smooth and it’s very straight forward to do. Giving yourself SuperSU status (root permissions) allows you to make major changes to your smartphone like un-install a carrier’s bloatware, view/edit/delete all files/folders/dirs on your smartphone, and install your own apps/software.
Recovery is pre-ROM boot sector that allows you to do some serious system admin stuff like clear cache/memory/dalvik, backup & restore, or install custom apps or ROMs from a *.zip file. Your smartphone should come with a standard Recovery, but it’s a sad thing and has very little advanced features. This is also a fairly straight forward thing to do.
Necessary Files
- CF-Auto-Root (another link can be found in the XDA tutorial)
- Samsung USB Driver (Samsung_USB_Driver_for_Mobile_Phones_v1.5.14.0.exe, can also be found on this thread section: Unroot Your Device)
- ODIN (v3.07 here on XDA)
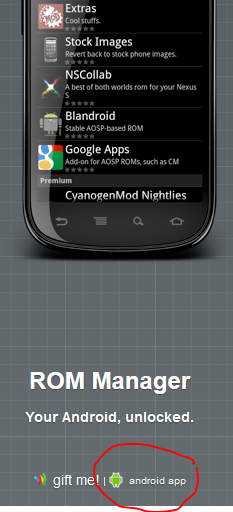
- ROM Manager (to direct download from ClockworkMod site, see image below on how to click on Android App) (available in the Google Play store free once you connect to WiFi on your device too)
Video Tutorial of ROOTing and Installing Custom Recovery
ROOT the Samsung Galaxy s3
There are three ways I know of to ROOT your Samsung Galaxy S3. Read about them on this XDA thread here. I will show you how to do the second method, which works for International phones too.
Download ODIN, and the CF-Auto-Root files. Keep CF-Auto-Root in it’s *.tar.md5 format, ODIN should be extracted so you can run the program.
- Install the necessary Samsung USB drivers so your Samsung Galaxy S3 can communicate with your computer
- Boot into Download Mode on Samsung Galaxy S3 (from a powered off state, hold: vol down + home + power buttons)
- Press: vol up <- to confirm you accept the dangers/risks
- Run ODIN (double click on computer)
- Plug in your smartphone to your computer (confirm COM status OK)
- Confirm ODIN Settings

- Click: PDA -> browse to CF-Auto-Root ___.tar.md5 file you’ve downloaded (see above links)
- Confirm MD5 checks are all OK
- Click: start
- Phone will reboot once into Red Android Screen, then once again to your regular screen
- You can unplug your Galaxy S3 anytime after you see the Red Android Screen
- Confirm SuperSU app icon exists
Install Custom Recovery ClockworkMod on Samsung Galaxy S3
You can either download the ROM Manager from their site (shown above), or you can browse to the Google Play store and download it from there. The second way will ensure you get the latest version of ROM Manager. Either way works.
- Install ROM Manager (root access is needed for this, and your smartphone will prompt you to grant it access)
- Select: Recovery Setup
- Install or Update Recovery -> click: ClockworkMod Recovery
- Confirm/select your phone model
- Recovery -> Confirm your phone model is identified correctly
- note: ClockworkMod Touch is a powerful Recovery, but it is a paid option
- Select: Flash ClockworkMod Recovery
This will then download the CWM Recovery from the internet (if you don’t have access to the internet it will prompt you with an error about SD Card not readable/writeable), prompt SuperSU permissions grant, complete, and then give you a popup about installing Touch (which you can just cancel).
You now have a CWM Recovery. Go ahead and boot into Recovery and check it out! This is where you’ll install most of your custom ROMs, and do some backups.
Final Thoughts on ROMs and Recovery
The version of your phone (mine: i747m d2mtr) is very important. This will dictate which ROM you install, which CF-Auto-Root to use, etc. This information is usually checked by Recovery before installing a ROM, but it’ll also help you find a ROM that will work for your smartphone.
It is important to note that once you’re at Android ver: 4.4.1 you cannot flash back to anything less than (like Android 4.1.1). This will cause errors and wont work. If you do this, you’ll most likely put your phone into a state called soft brick. As the name implies, your phone will only be softly dead. To recover your phone, you’ll want to use ODIN to flash the stock ROM (this is the ROM that came from your carrier, and most Samsung stock ROMs can be found on sammobile.com).
If you’re trying to switch networks with your phone, try any unlock tricks before you upgrade your ROM (ie. when you’re at 4.1). Being at 4.4.1 will make any tricks I’ve found not work. If you’re already there, then I’d suggest using www.cellunlocker.net (also see a video tutorial I’ve created of this here) to get your Network Unlock PIN. They’re cheaper and quick, and you can do it all without leaving your comfy desk.
Finally, if you are having any troubles, looking for ROMs, want to have in-depth discussions with the Pros, make yourself an XDA Developers account and enjoy their forums. They’re extensive and cover almost any device you can imagine.
If you have any questions, don’t hesitate to leave discussion below or ask questions.
Hope this helps!