As you become more familiar with your DSLR camera, you will learn that taking photographs in RAW or CR2 format is the only way to go to capture the most information for your images.
But, you should also know by now that you cannot upload RAW files to flickr, tumblr, facebook, or wherever else you wish to upload your images to, so you will need to edit the images, or at least export them to *.jpg (jpeg) files.
If you do choose to edit your images, it is smartest to edit them while they are in RAW format, because this format provides the most accurate color information possible for your photo, as well, if you enable saving history for the edits, you can restore it easily to the original colors the image was.
So, first off, to enable the image settings to save your history in a file, one should make sure that your photo editing program is properly set up to do this. In Photoshop, this is done by going to edit -> preferences -> file handling -> camera raw preferences -> save image settings in: sidecar *.xmp files

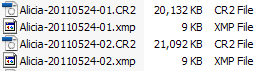
This will now create a ‘sidecar’ file in the folder that your *.RAW file is located in:
A photographer should also make sure that they have properly set up a history log for other images as well, which we’ve gone over here.
Note: If you should ever choose to move your *.RAW or *.CR2 files from their location that they are in at the time of edit, one should make sure they also move the *.xmp file with it, for this keeps all information about the editing that has been done to the file. Without this information, the image will revert back to its original state.
Pingback: Photoshop History Log | Electronic Services
Pingback: Error Message: Camera Raw editing is not enabled. « Application & Program Tips « Tech Tips